2.5 Viewport overlays
Three floating clusters sit over the viewport, plus two edge tabs flush against its right side.
- Add (top) — the ways to put something in the scene.
- Gizmo rail (left) — move / rotate / scale, the world ↔ local toggle, and snapping.
- Probe (left, below the rail) — the hover readout.
- View tab — what the viewport draws: beams, footprints, cables, labels, measurements, cutters, grid.
- Shading tab — the simulation: off, lux heatmap, or content preview.
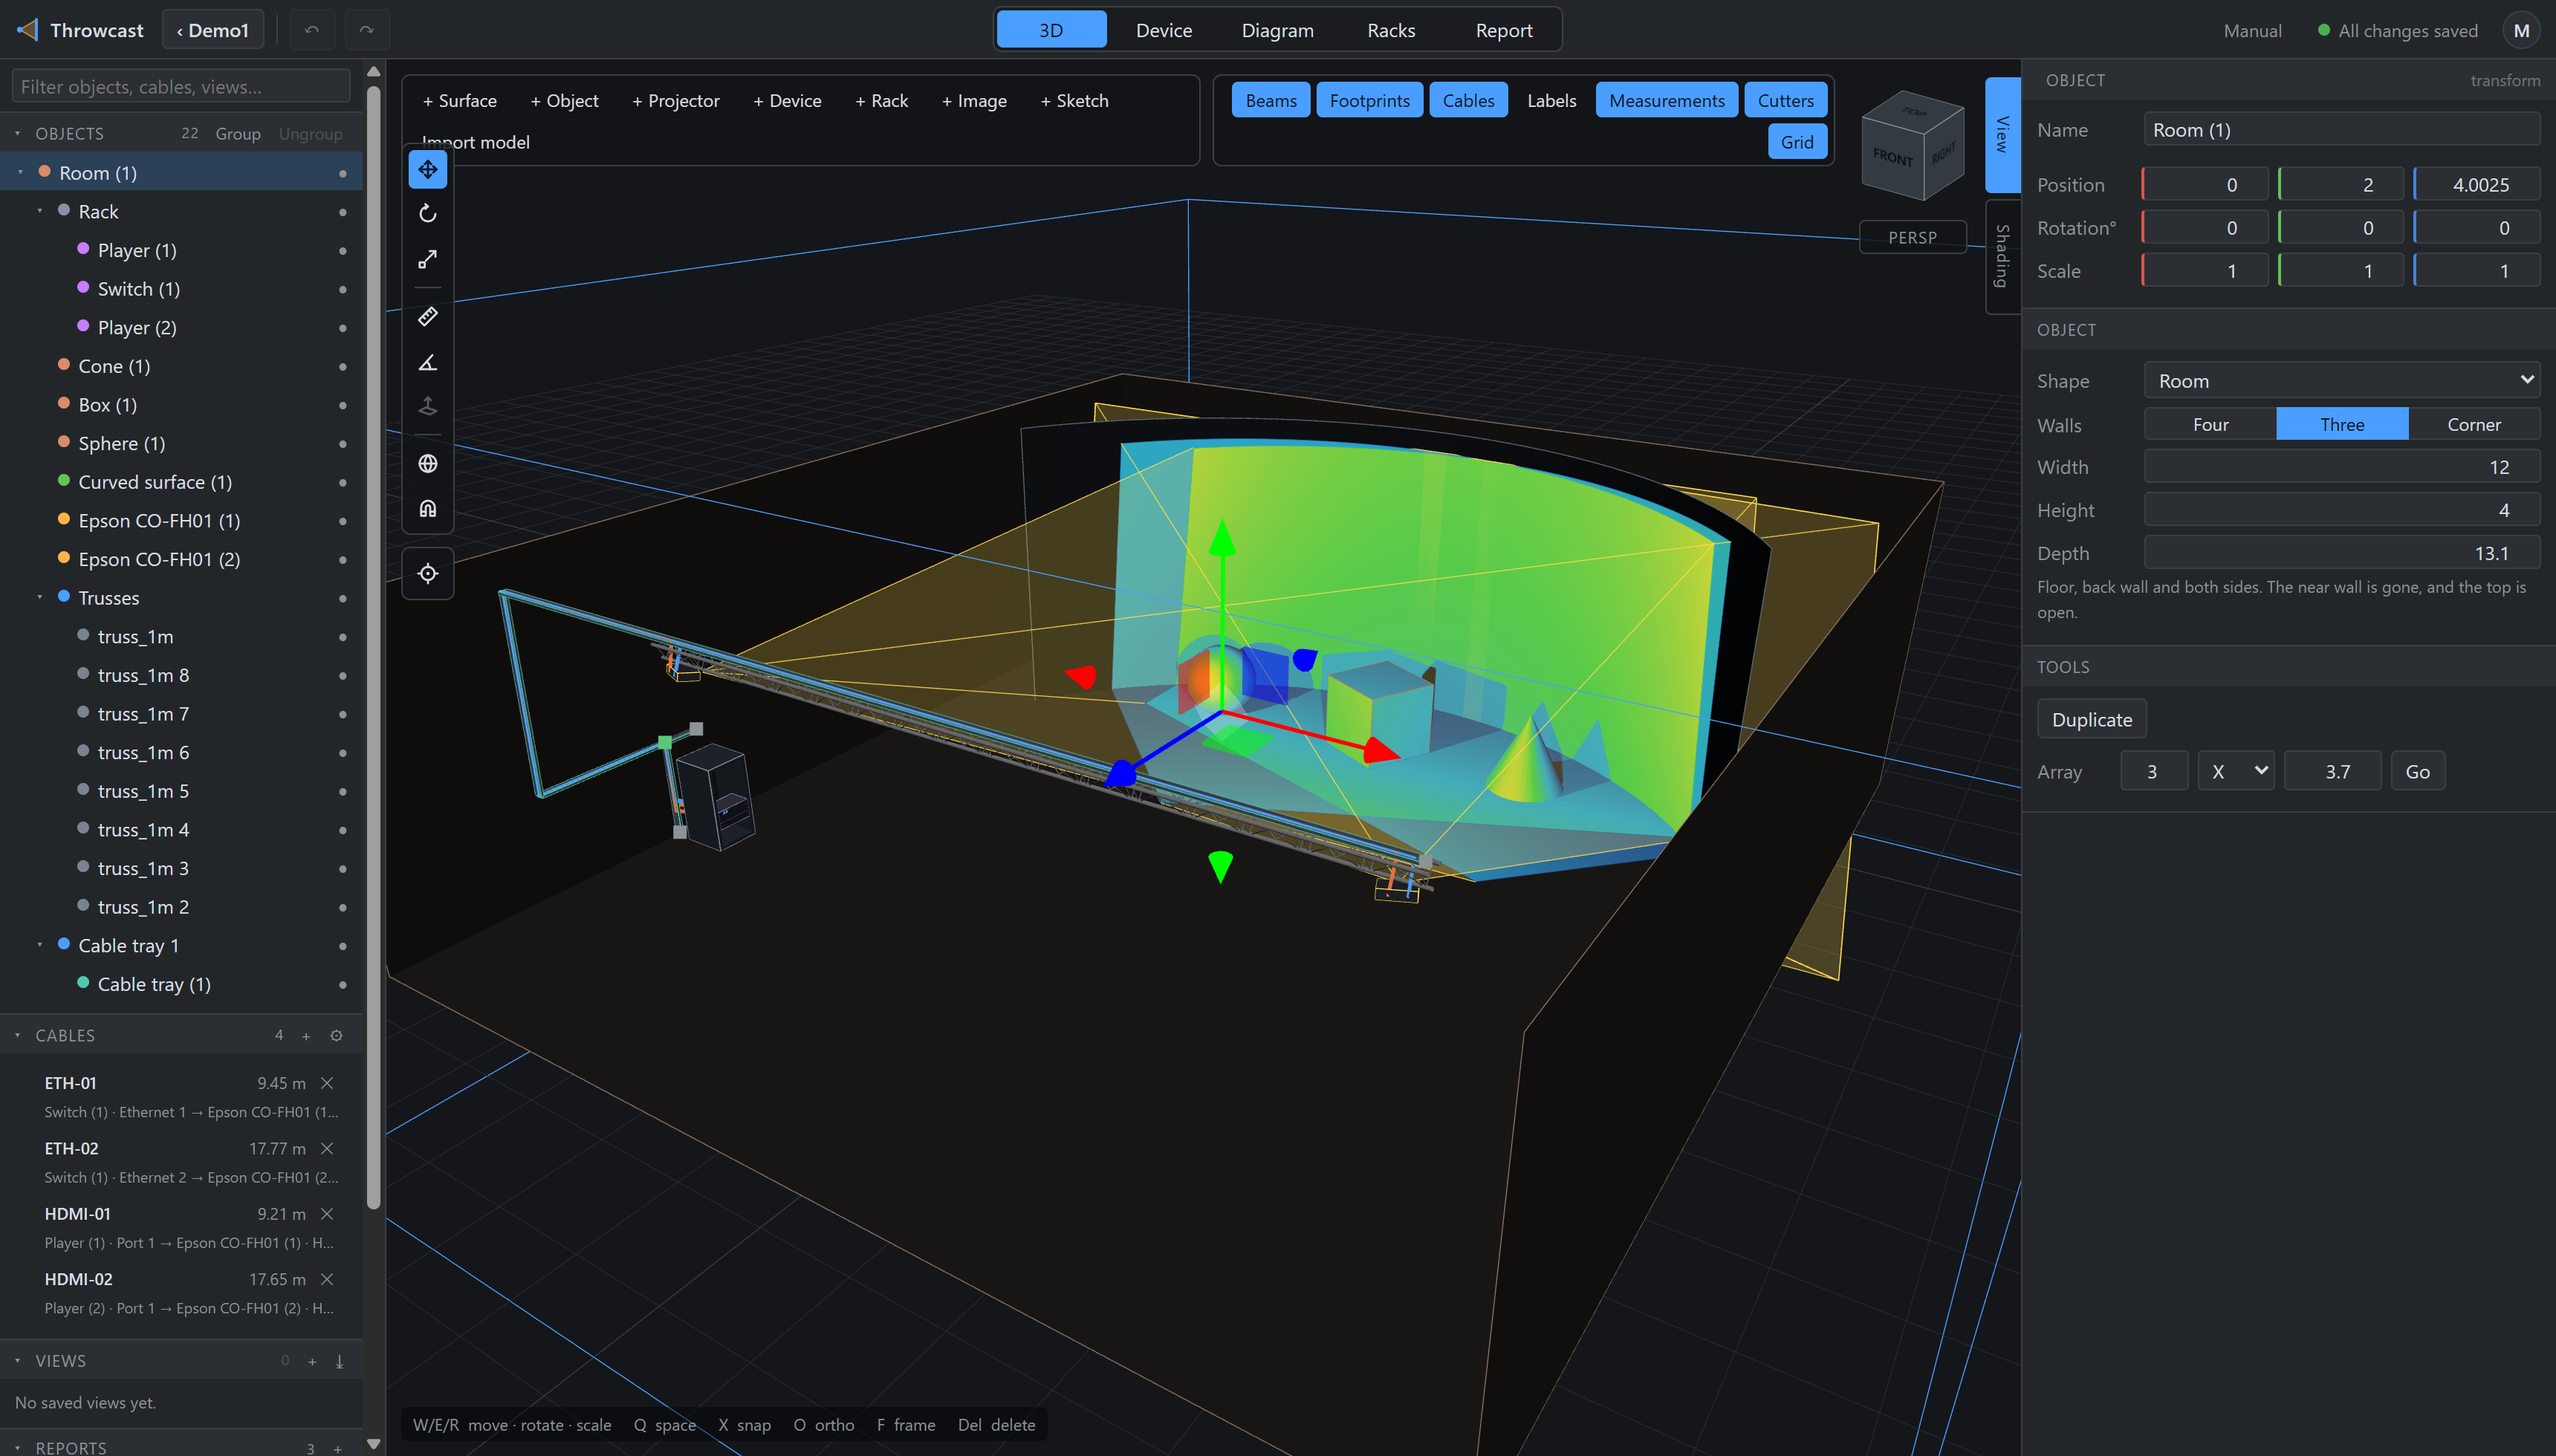
The projection is not in here: PERSP / ISO is the plate under the ViewCube, where the rest of the camera lives, rather than a second switch for the same setting three panels away. And a sixth button, Drawing, joins the cluster only while a report’s 3D view is being framed — a drawing is a way of presenting rather than a way of working, so it belongs to the block that prints it (§11.5).
Labels is the one display overlay whose cost grows with the rig — one name chip per object, drawn over the geometry — so a venue would open under a drift of callouts hiding the things they name. It starts off; beams, footprints, cables, measurements and the grid start on. If you have ever touched a toggle yourself, you keep what you chose.
A lit edge tab means one thing only: that panel is open. It does not indicate which shading mode is active — the venue itself is repainted for that, which is hard to miss.